
Cleaning Laptop Cooling System and Applying Thermal Paste
- Oct 16, 2017
- 3 min read


How to Fix an Overheating Laptop
If your laptop has slowed down significantly during the last few weeks, then there might be something wrong with the cooling system.
Often times, when the processor heats up too much, the operating system slows down the clock speed in order to cool it down – resulting in a performance loss. However, it is possible to clean up the cooling system and restore its previous working condition well inside an hour. We will take you through a DIY process of how you clean your laptop cooling system and reapply thermal paste.
Part 1
Cleaning the Cooling System

Most of the laptops make use of “heat piping,” copper tubes that channel heat from the CPU and GPU to the heatsink. Lint and dust accumulation prevents air from flowing around the cooling fan blades and causes the fan to work harder and the laptop to get hot.
You should clean the laptop by blowing out the dust from around the fan and heat shield. It is not necessary to open the laptop to clean out the dust. With a can of compressed air you can blow into the vents on your laptop, and into other openings such as the fan intake vent to help keep the air circulating and prevent dust from accumulating on components. If overheating issues persist after cleaning the vents you have to take apart the laptop and clean it manually
Here’s what you need to do to clean the cooling system:
Firstly check your laptop’s manual, or look up a manual for disassembling for your specific model of laptop online.
Go ahead and shop for some usual tools such as a screwdriver, tweezers and laptop case opening tools or a smooth plastic edge. For the next step you will need thermal paste. You can easily find one online, it costs about $10. Next up, get some cotton swabs and Isopropyl Alcohol. Finally, a plastic card or disposable plastic polythene gloves… don’t worry, you will use them for applying the thermal paste.
It may be a good idea to take a picture or record of all your steps. You don’t want to have extra parts after you reassemble the laptop.
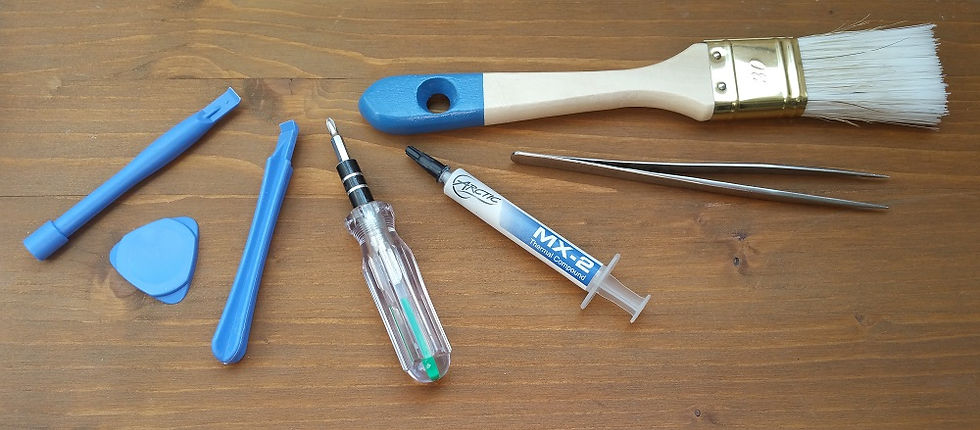
From left to right: plastic opening tools, screwdriver Phillips #01, thermal paste, tweezers, paint brush
Shut down your laptop, unplug it, and remove the battery.
Slowly start unscrewing your laptop. If you still have the warranty sticker on, be sure to take it off as well – you will unearth a screw below it.
Some laptop models have a Fan/Dust cover. From there you have direct access to the cooling system.


Lenovo Ideatab E530C - Fan/Dust cover
Check for the screws securing the keyboard and remove it. You may have additional screws under the keyboard. Once you have unscrewed the back of the laptop, take the cover off and put it aside.

A single look at the internals is enough to locate the cooling system – a moderately sized fan.
Depending of the model of your laptop you may have to remove the motherboard because the cooling system is under it.
The cooling system will still be attached to the motherboard via a connector, don’t tamper with it. You will have enough room to take it out.

Also, make a mental note of where the heat sink touches the respective chips. This will come in handy when you are placing it back on.
If it’s possible to take out the fan without removing the cooling system, clean the dust between the lids of the fan, then simply take a small brush and dust it off. Now, take a cotton swab, dip it in the alcohol, and then clean the insides of the fan.


Comments